
Jun 9, 2026
The Magic Hour – The Most Beautiful Light for Special Photographs
There are a few moments each day when even ordinary places suddenly take on a special atmosphere. Streets seem calmer, landscapes gain depth, and colors begin to glow intensely. In photography, this short and fascinating period is known as the “Magic Hour.” For many photographers, it is the best time of day to shoot because the light appears softer, more atmospheric, and far more emotional than at midday.
What makes it especially exciting is that the Magic Hour does not describe just a single moment. Instead, it includes two distinct lighting phases: the warm Golden Hour and the cool Blue Hour. Each creates its own unique visual effect and offers creative possibilities that are difficult to achieve in normal daylight.
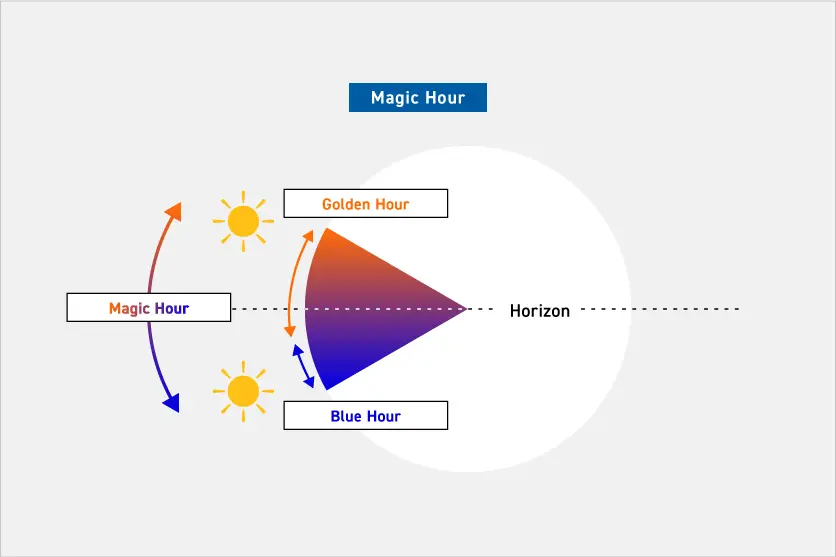
What Exactly Is the Magic Hour?
The Magic Hour refers to the period around sunrise and sunset when sunlight reaches the Earth at a particularly low angle. This not only changes the brightness but also the color quality of the light. Shadows become longer, contrasts softer, and the entire environment takes on a much more atmospheric appearance.
While daylight often creates harsh light with strong contrasts, the light during the Magic Hour feels much gentler. Skin tones appear more natural, landscapes gain more depth, and even simple subjects suddenly look almost cinematic. That is exactly why this time of day is popular not only among landscape photographers, but also in portrait, travel, and street photography.
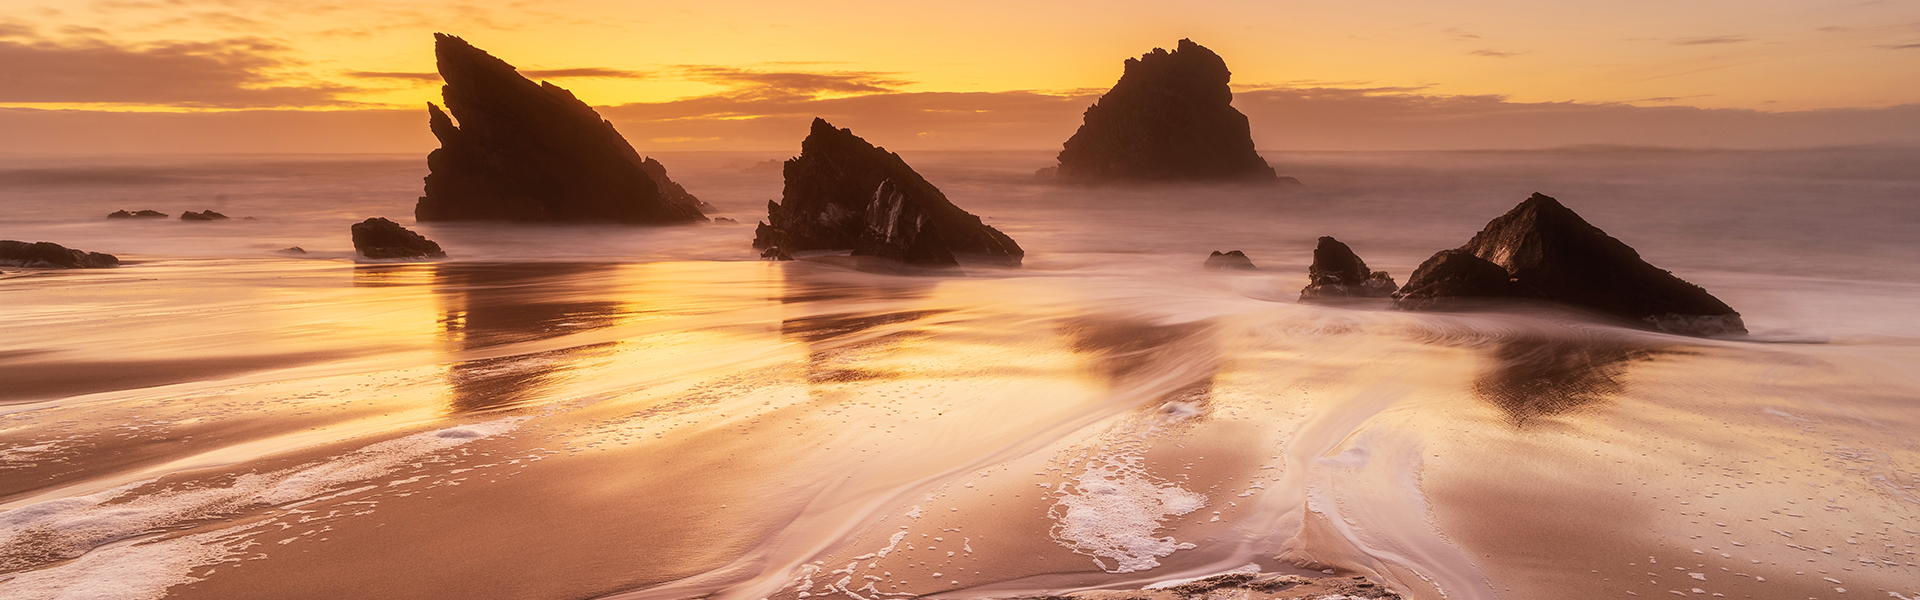
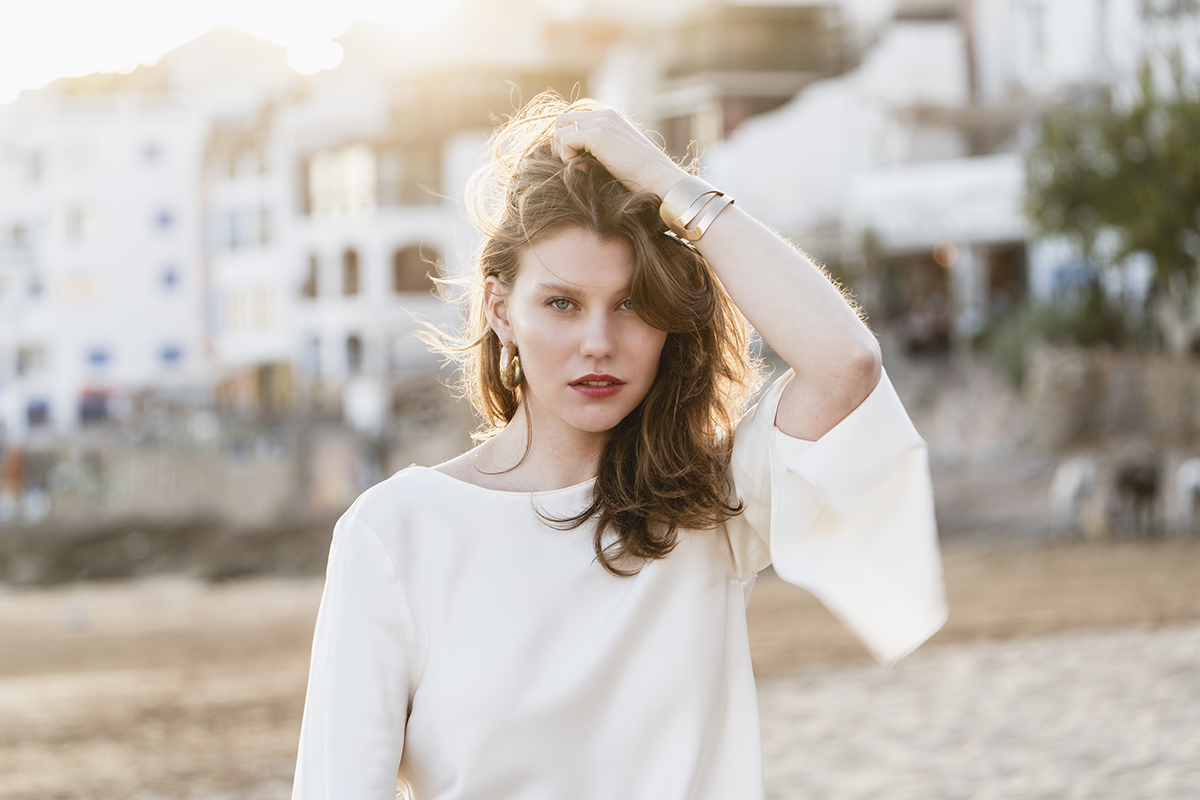
The Golden Hour – Warm Light with an Emotional Impact
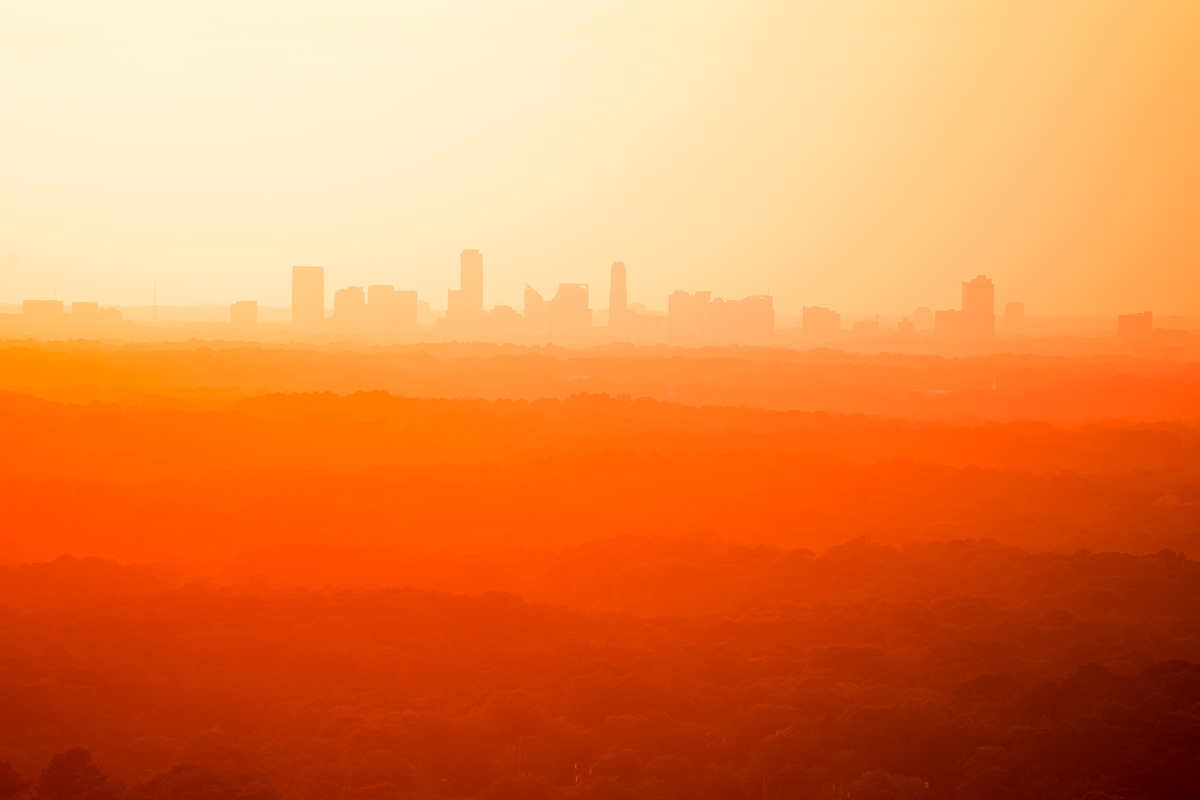
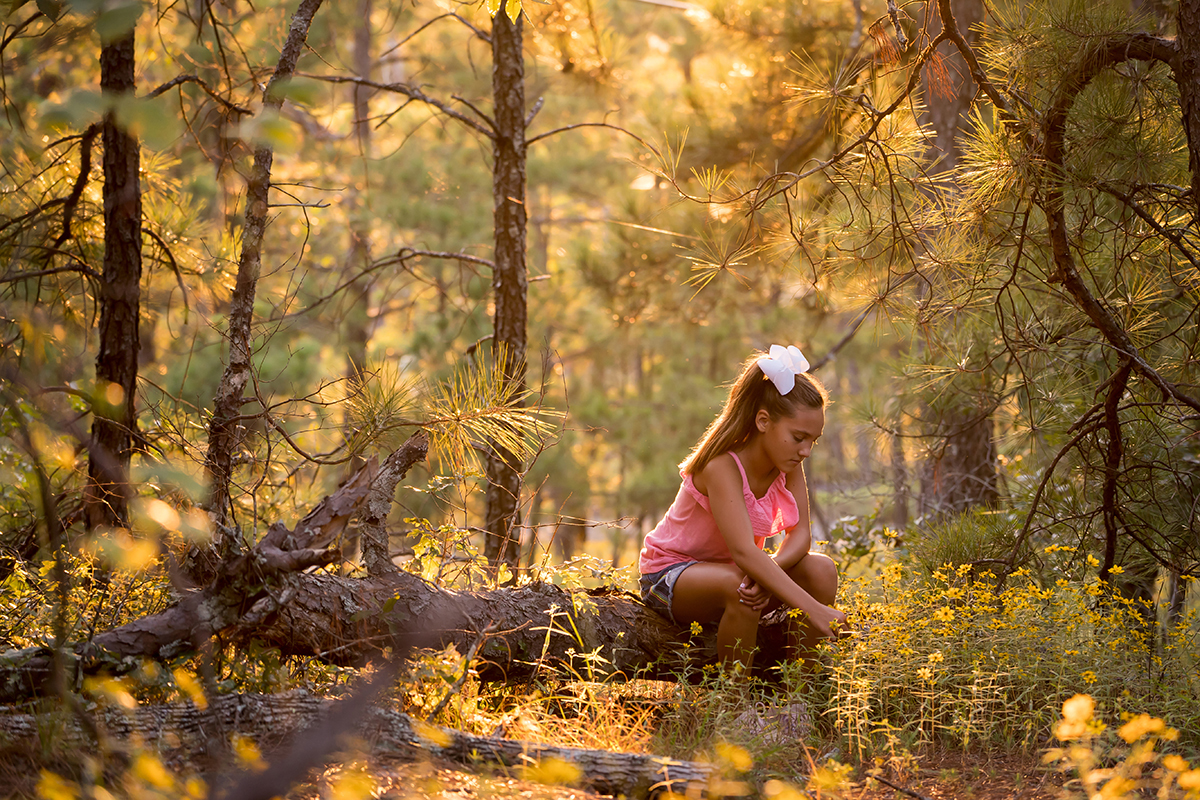
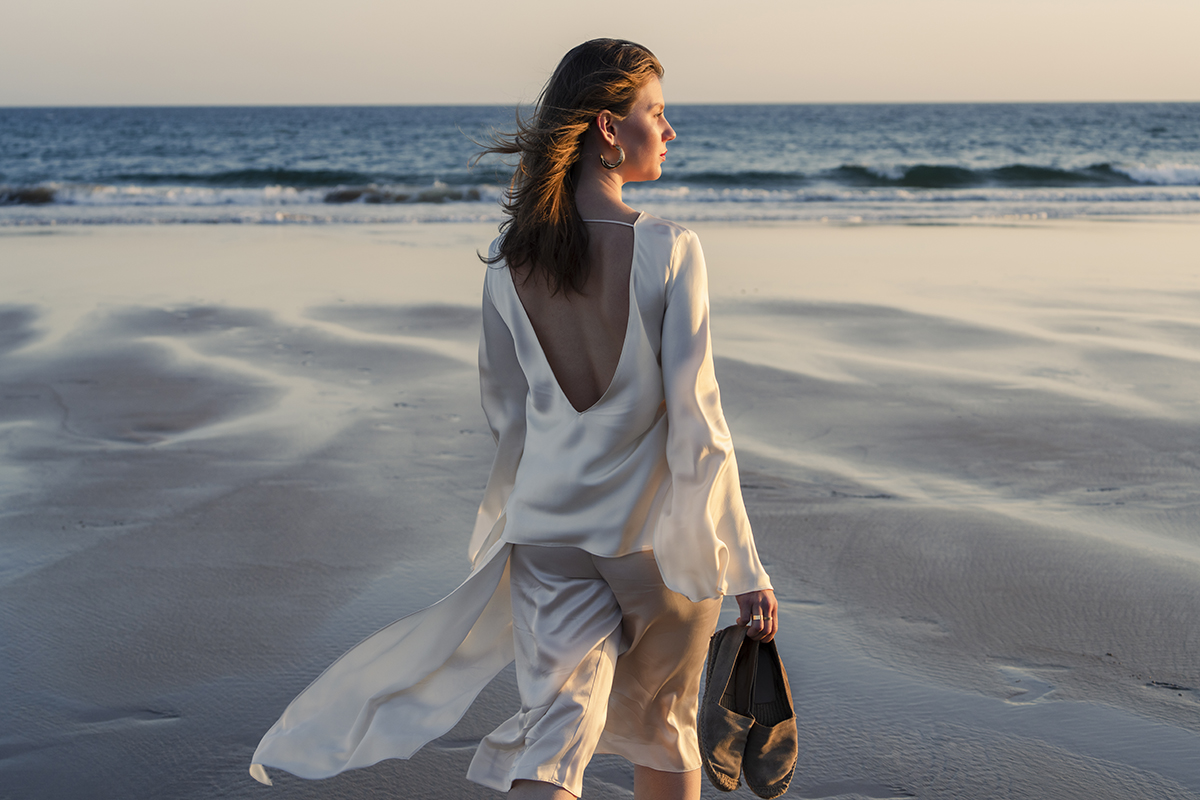
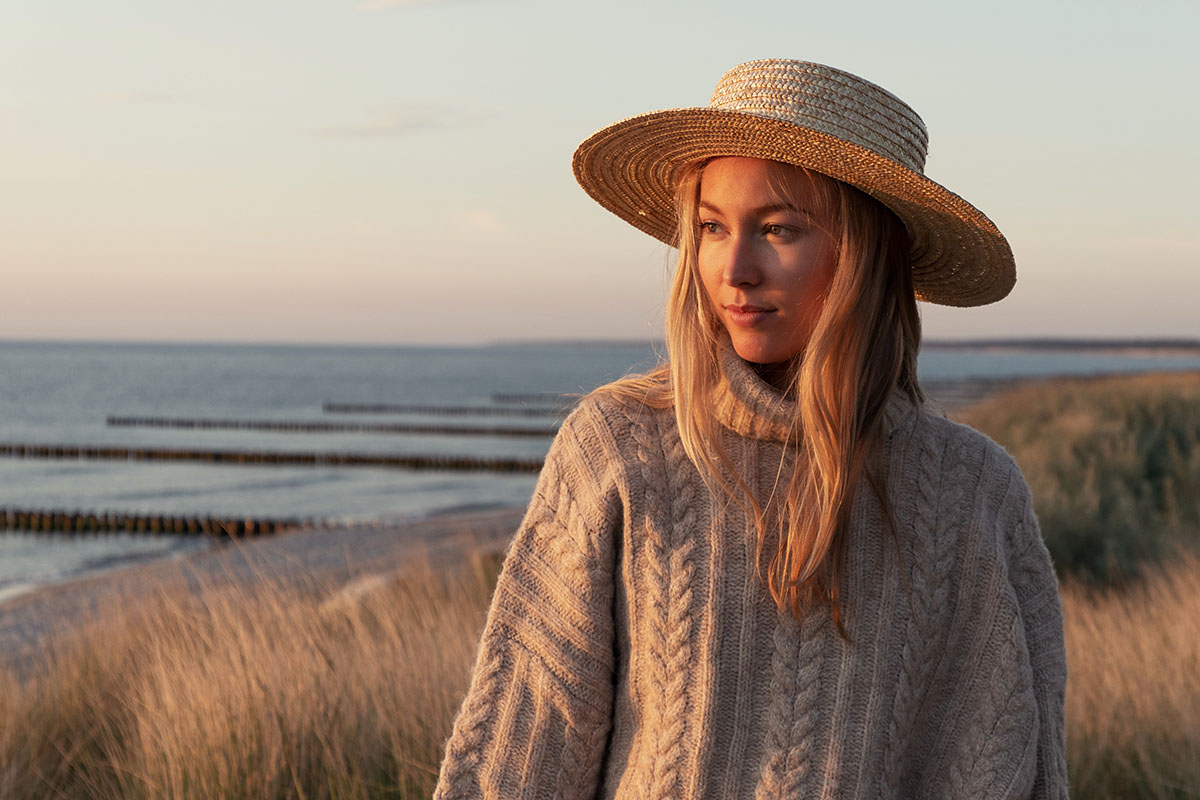
The Golden Hour takes place roughly one hour after sunrise and one hour before sunset. During this time, the sun sits very low in the sky and bathes the surroundings in warm golden, orange, and reddish tones. The light appears especially soft and flattering, which is why many photographers intentionally schedule their shoots during this period.
The warm color effect occurs because sunlight has to travel a longer path through the atmosphere. In the process, the blue wavelengths are scattered more strongly, while the warmer colors dominate. The result is the characteristic golden light that automatically gives photographs a more emotional and atmospheric feel.
In addition, the low position of the sun creates long shadows. This adds depth to images and makes subjects appear more three-dimensional. In landscape and architectural photography especially, this creates an impressive sense of space. Portraits also benefit greatly, as skin appears softer and facial features are modeled more naturally.
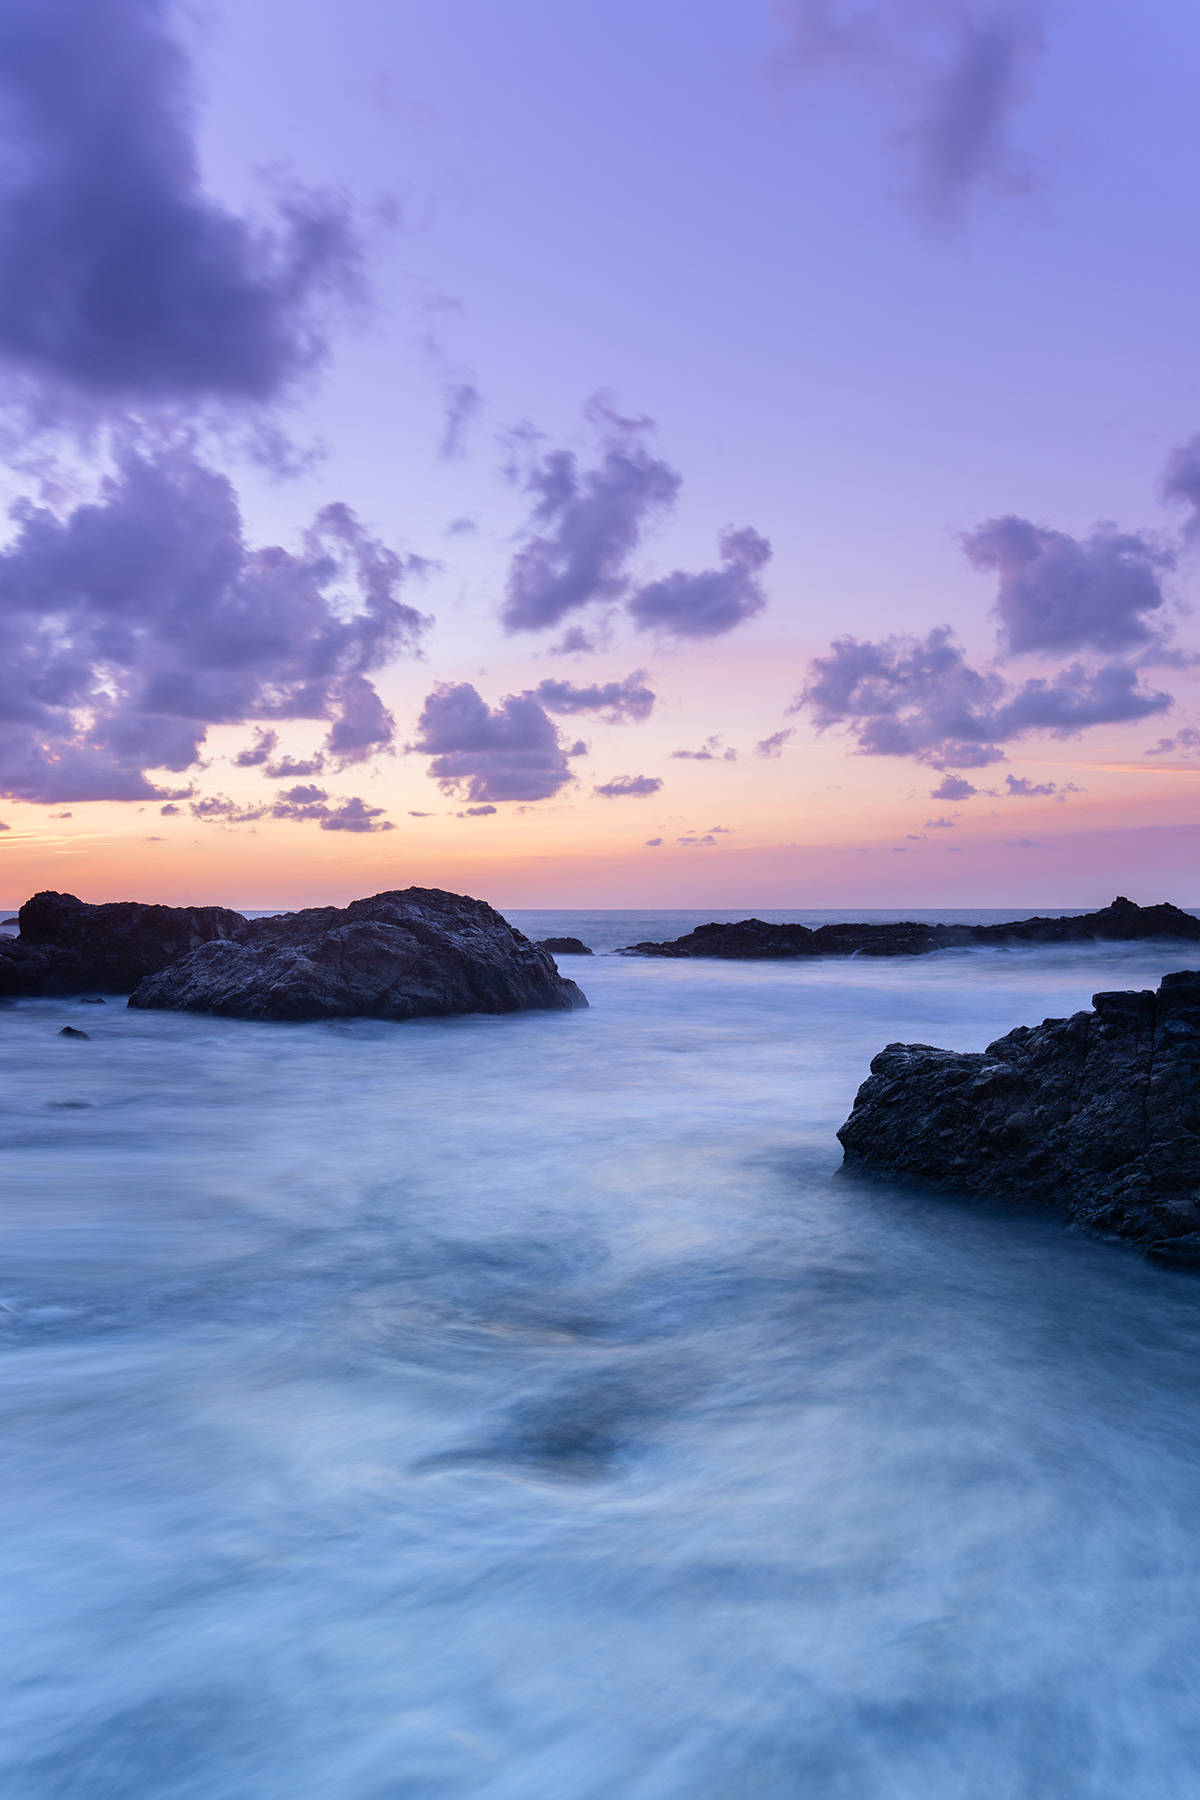
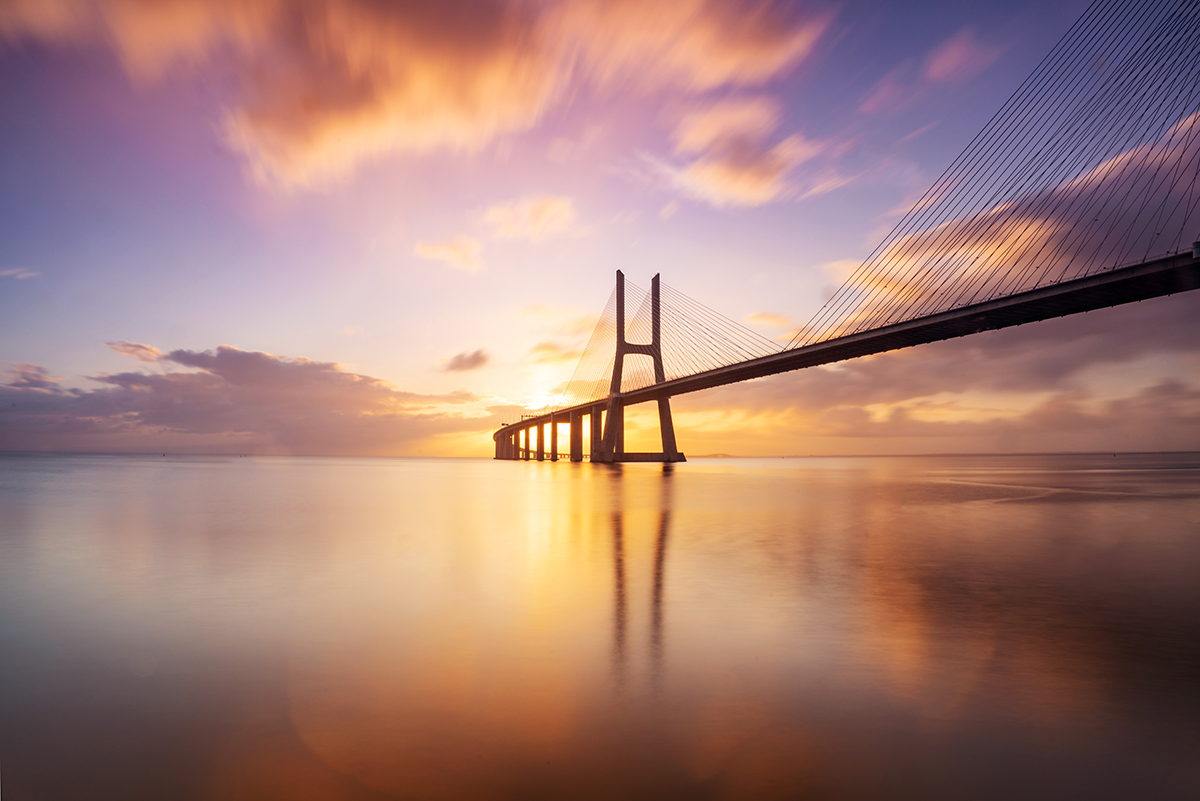
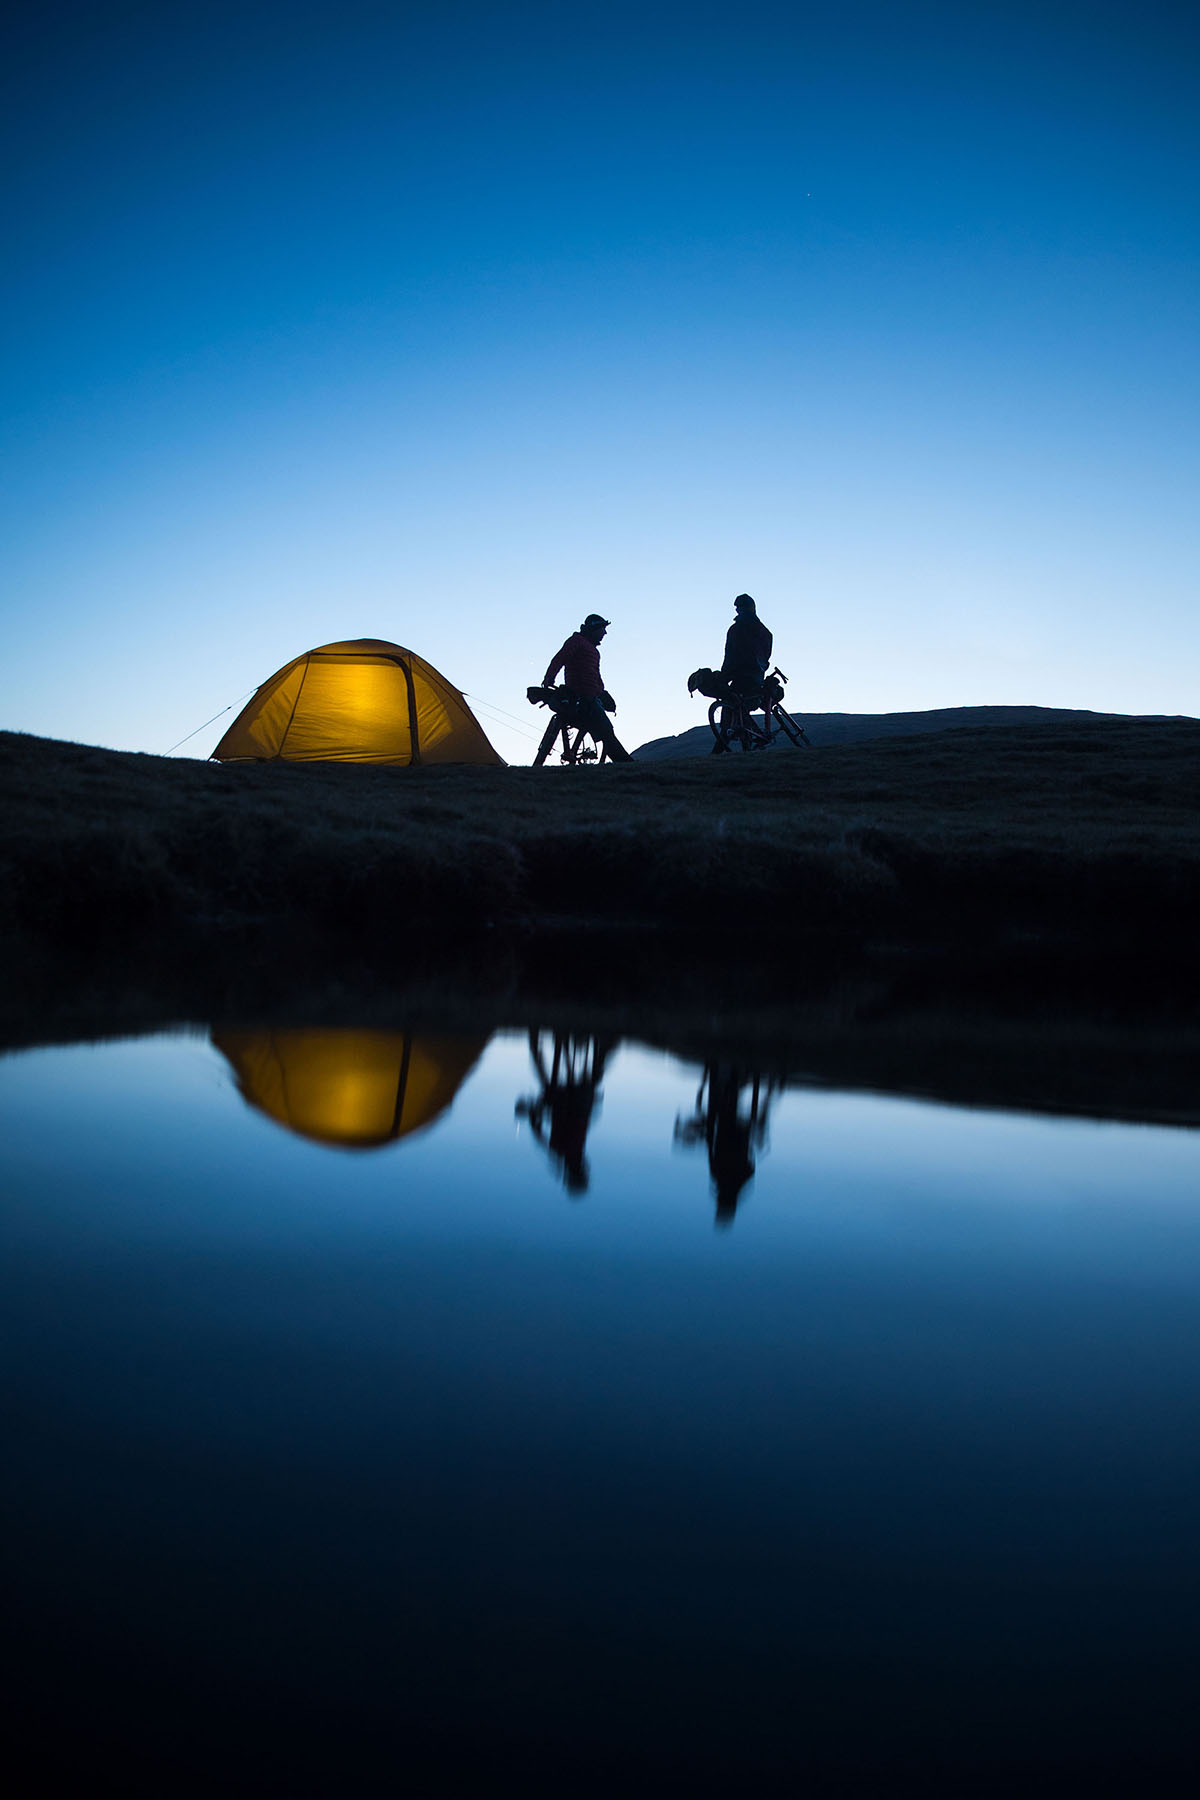
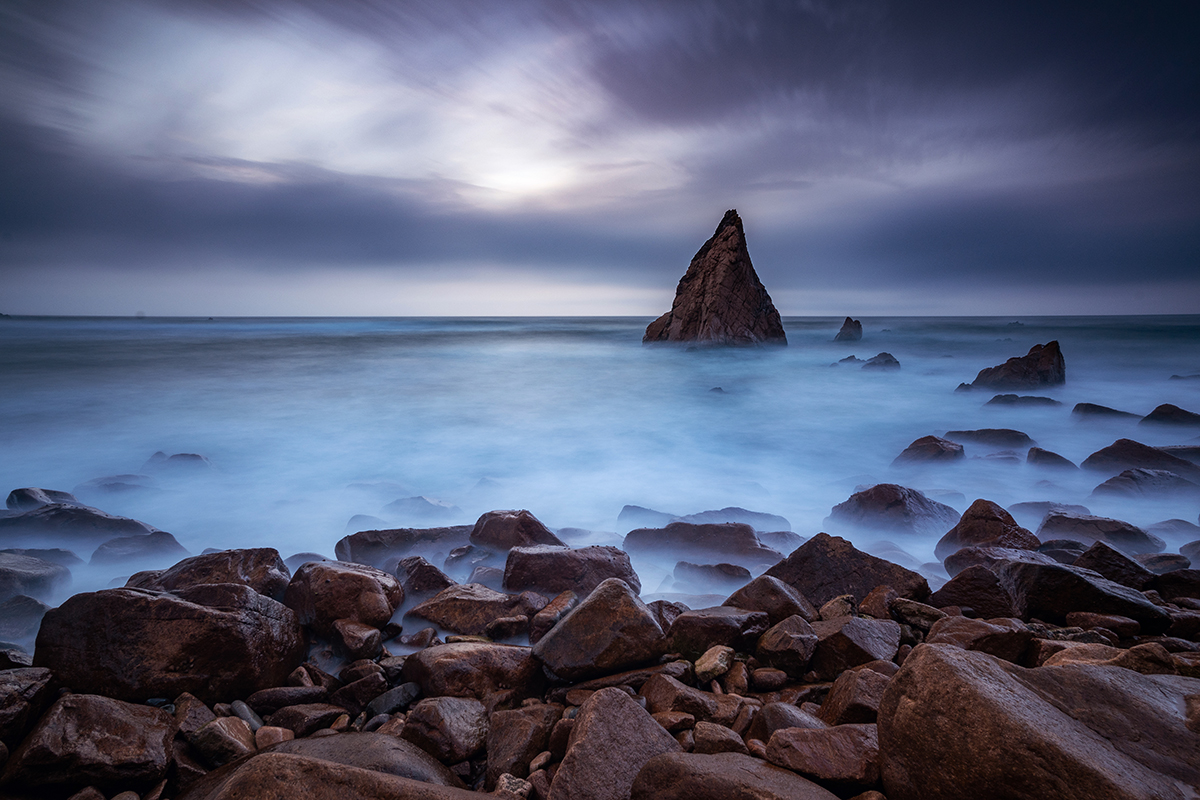
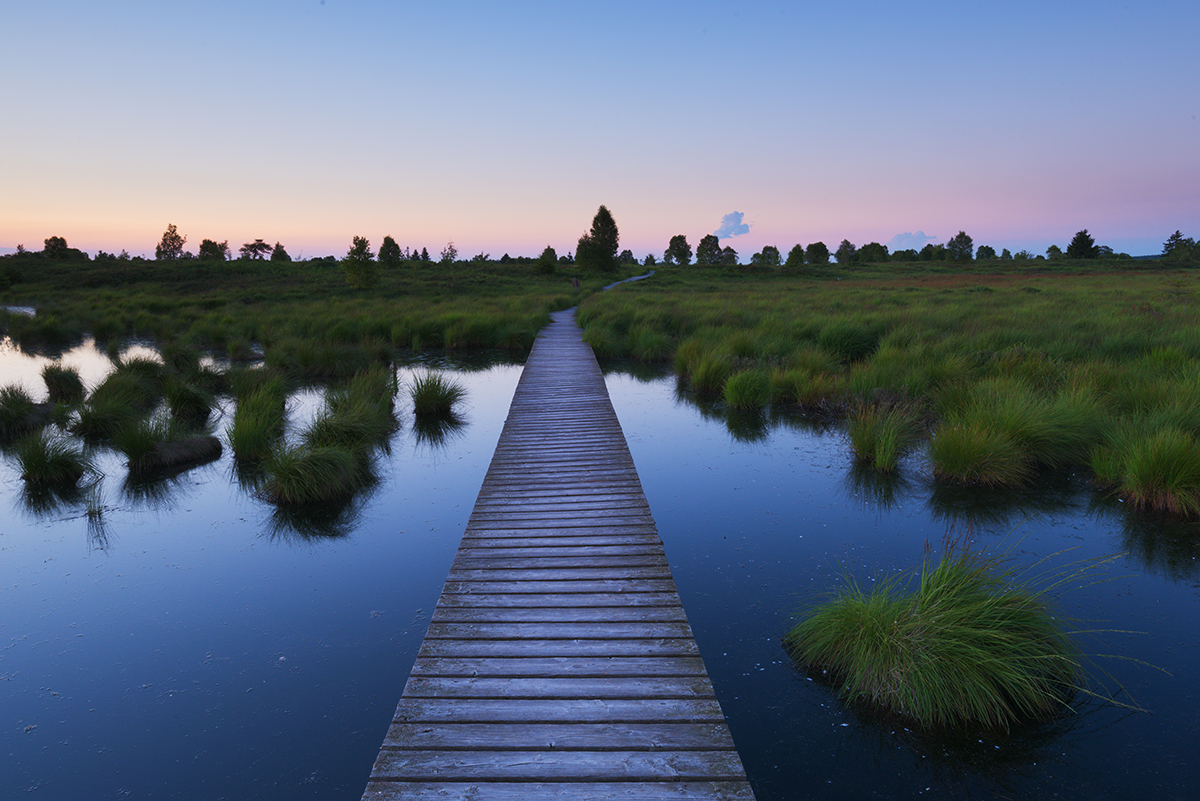
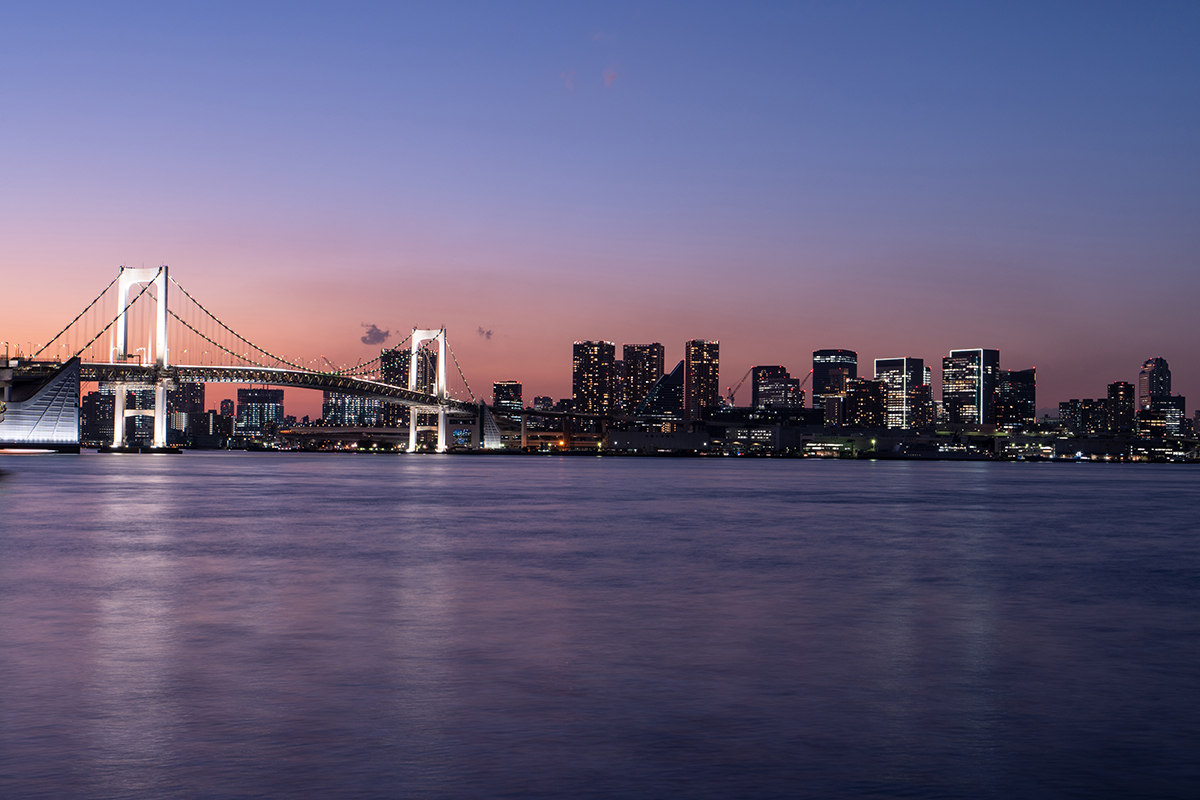
The Blue Hour – Calm Atmosphere and Cinematic Colors
The Blue Hour begins immediately after sunset. At this point, the sun is already below the horizon, yet there is still enough residual light left in the atmosphere. The sky turns into deep blue and violet tones, creating a calm and almost mystical mood.
The Blue Hour reveals its full beauty especially in cities. Streetlights, shop windows, and building illuminations begin to glow, while the sky still retains enough texture and detail. This creates a harmonious balance between natural and artificial light. That is exactly why cityscapes photographed during the Blue Hour often appear far more atmospheric and visually striking than images taken in complete darkness.
This time is also perfect for long-exposure photography. Light trails from cars, reflections on wet streets, or illuminated skylines gain an especially elegant look under these conditions. Many iconic city photographs are captured during this short but magical window of time.
Why the Magic Hour Makes Photos So Special
The unique effect of the Magic Hour comes primarily from the fact that the light appears much softer and more natural. Harsh midday sunlight often creates strong shadows and blown-out highlights, whereas the low position of the sun produces gentle transitions and balanced contrasts. As a result, images look more harmonious and visually pleasing.
Another important factor is the emotional impact of the colors. Warm golden tones often evoke feelings of calmness, nostalgia, or warmth, while the cooler colors of the Blue Hour tend to feel modern, peaceful, or mysterious. Light therefore influences not only the technical quality of a photograph, but also the mood and emotion it conveys.
Even ordinary subjects can look extraordinary during the Magic Hour. A simple street, a field, or the facade of a building suddenly gains character once the lighting is right. That is exactly what makes this time of day so fascinating for many photographers.
Tips for Photography During the Magic Hour
To make the most of this special light, good preparation is essential.
Preparation is everything
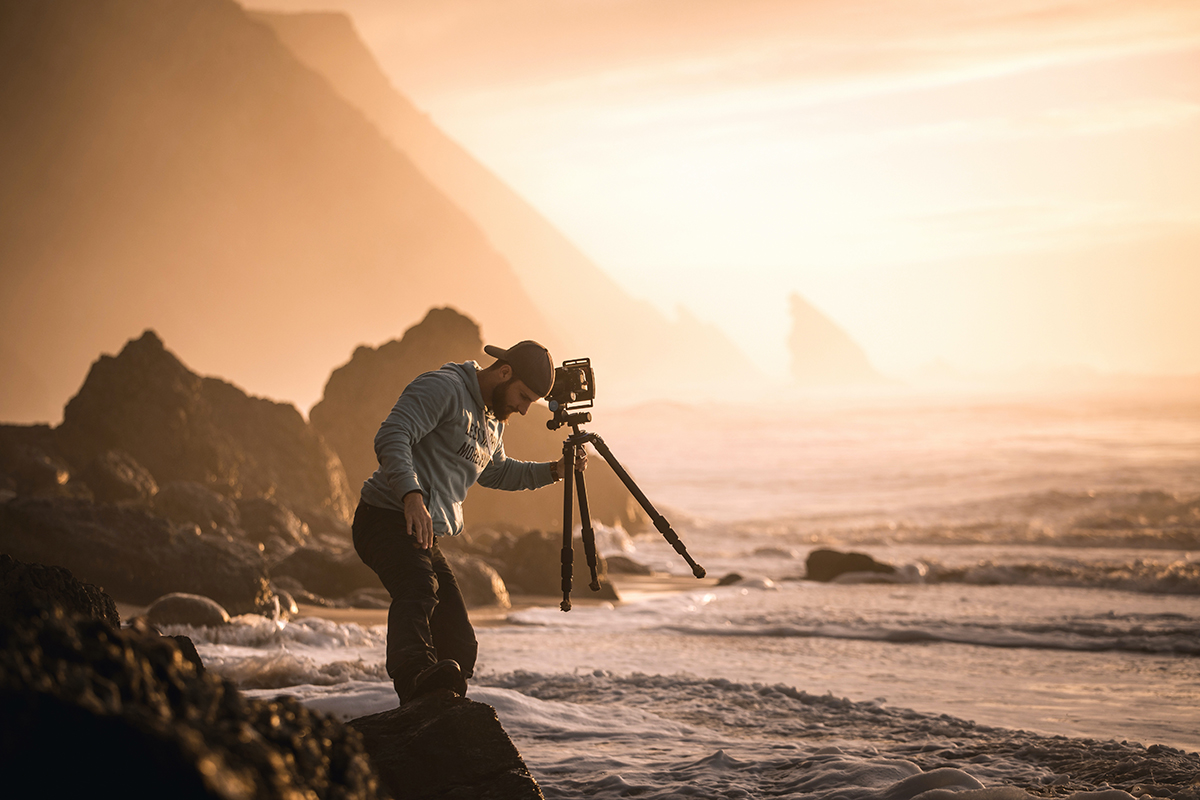
The biggest challenge of the Magic Hour is that it is very short. The light can change significantly within just a few minutes. That is why preparation is especially important.
Many photographers visit their location in advance or plan their shoots using apps that display sunrise/sunset times and sun position. Arriving early allows you to test different perspectives and better adapt to the changing light conditions.
Weather also plays a major role. Light clouds can make sunsets much more dramatic, while completely overcast skies often reduce the intensity of the light. On the other hand, humidity or fog can create interesting color gradients and an especially soft atmosphere.
The right exposure settings
The light changes constantly during the Magic Hour, so you should keep your settings flexible.
Shooting mode
For beginners, aperture priority mode is a good choice. You set the aperture, and the camera automatically adjusts the shutter speed. This lets you focus more on composition and image impact.
With some experience, it is worth switching to manual mode later on to control exposure more precisely.
Aperture (f-number)
The appropriate f-stop depends on your subject:
For landscapes: around f/8 to f/11, to keep everything in sharp focus.
For portraits: wider apertures such as f/2.8 or f/4, to create a pleasing background blur (bokeh).
Since the light during the Magic Hour is relatively low, you should avoid stopping the aperture down too far, as this can force your camera to use longer shutter speeds or higher ISO values.
Shutter Speed
To avoid camera shake, a shutter speed of around 1/125 to 1/250 second is generally recommended.
For night shots using a tripod, however, you can use much longer exposures—several seconds or even more.
ISO
For the cleanest, noise-free images, ISO values between 100 and 400 are ideal.
If the light becomes too weak, you can increase the ISO to around 1600 to 3200, though this may introduce more image noise.
Exposure Compensation
During the Magic Hour, strong contrasts and backlit situations often occur.
If a face appears too dark: slightly increase exposure compensation.
For silhouettes or a more dramatic mood: reduce exposure compensation.
White Balance (Using It Intentionally)
White balance has a strong influence on the overall mood of an image.
Auto white balance provides a good starting point and usually produces natural-looking results.
The “Cloudy” setting enhances warm red and orange tones—perfect for the Golden Hour.
“Tungsten/Incandescent” intensifies the blue tones of the Blue Hour.
If you shoot in RAW format, you can adjust both white balance and exposure flexibly during post-processing without losing image quality.
Using Backlighting Intentionally
One of the most beautiful effects during the Magic Hour is backlighting. Especially during the Golden Hour, light can surround people or objects with a warm glow. Hair begins to shine, edges are emphasized, and images gain an almost dreamy atmosphere.
Many photographers deliberately use this effect for emotional portraits. Instead of placing the light directly in front of the subject, they intentionally shoot toward the sun. This creates soft light flares and adds a strong sense of depth to the image.
During the Blue Hour, backlighting feels much calmer and more minimalistic. Combined with streetlights or neon signs, it can produce modern, almost cinematic-looking photographs.
Creative Image Composition
With the right composition, you can further enhance the impact of this special light.
Rule of Thirds
Mentally divide your image into three equal parts, both horizontally and vertically. Place important elements along these lines or at their intersections.
Example: In a sunset seascape, positioning the horizon along the lower third often creates a more balanced and visually pleasing composition.
Diagonal Composition
Diagonal lines create depth and a sense of dynamism. Roads, buildings, or long shadows can guide the viewer’s eye through the image. Rising diagonals feel open and energetic, while descending ones appear calmer and more stable.
Central Perspective (Hinomaru Composition)
In this approach, the main subject is deliberately placed in the center of the frame. Especially sunsets or silhouettes can feel very powerful and emotionally striking with this composition style.
Subject Ideas for the Magic Hour
Portraits
Use backlighting to create a golden glow around hair and outlines. The soft light flatters the skin and produces a dreamy, atmospheric look.
Silhouettes or close-up shots also work exceptionally well, as the light naturally enhances shape and emotion rather than fine detail.
Landscapes
Using a wide-angle lens allows you to capture the impressive color gradients of the sky. Foreground elements such as trees, rocks, or buildings add additional depth and help create a stronger sense of scale and dimension.
Sunsets and Night Photography
The Magic Hour is perfect for cityscapes and skylines. Pay attention to the interaction between artificial light and the colors of the sky.
With a tripod, long exposures become possible, allowing you to capture light trails from passing cars and create especially dynamic and atmospheric night scenes.
Street Photography
Pay attention to how evening light creates patterns, contrasts, and shadows. Side lighting produces a nostalgic atmosphere that is often missing during the daytime.
Long shadows and silhouettes also add narrative depth to street photographs, helping to turn everyday scenes into more expressive visual stories.
Vehicles
Cars, trains, and airplanes also benefit greatly from the light of the Magic Hour. Side lighting highlights shapes and surface textures in a particularly appealing way.
For airplanes especially, reflections of the sunset on the fuselage create a dramatic and striking visual effect.
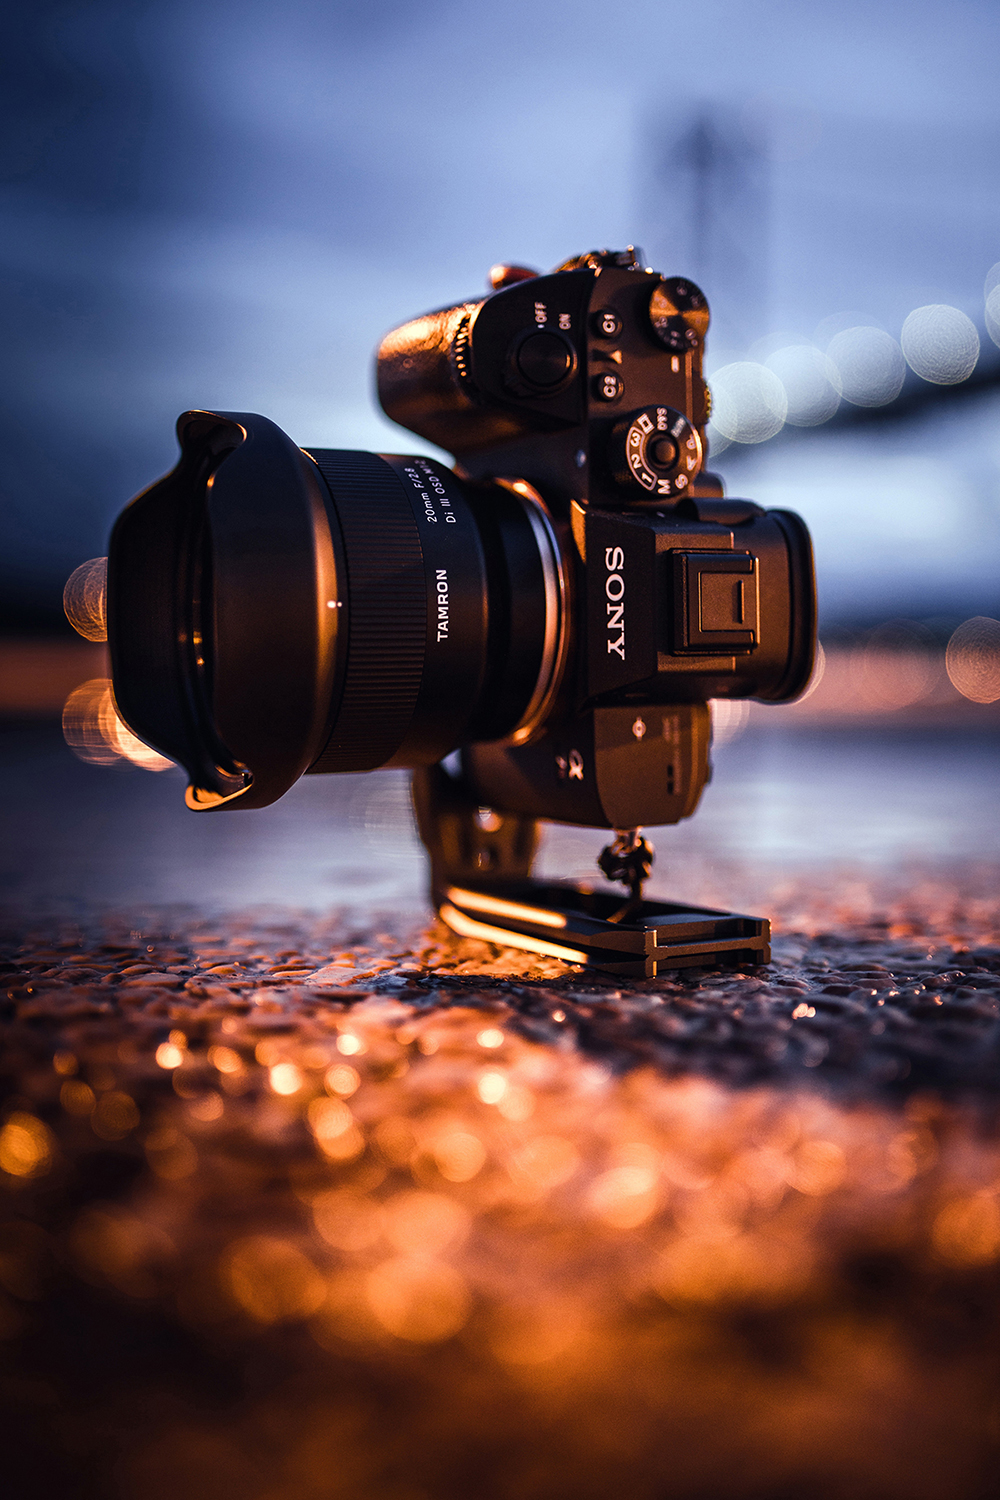
Choosing the Right Lens
Fast Lenses
Since light is limited, fast lenses such as f/2.8 are especially useful. Shooting wide open also creates a beautiful, soft background blur (bokeh).
Focal Length
Wide-angle: ideal for landscapes and expansive skies
Telephoto: perfect for distant subjects and portraits with background compression
Standard lens: natural perspective for street and portrait photography
Compact and Lightweight
Because you often move around during the Magic Hour, lightweight and compact lenses are particularly practical.
Autofocus Performance
In low light, fast and reliable autofocus is essential—especially when photographing moving subjects.
Image Stabilization
Image stabilization helps reduce camera shake during slower shutter speeds, especially when shooting handheld.
Conclusion: The Magic Hour Turns Ordinary Scenes Into Something Extraordinary
The Magic Hour is one of the most beautiful moments for photographers. The soft light, intense colors, and unique atmosphere give images an emotional depth that is often missing during the day.
Whether it’s portraits, landscapes, street photography, or cityscapes—learning to work consciously with this light allows even everyday subjects to be transformed into striking photographs.
The most important rule is: observe, experiment, and seize the right moment. That is exactly what makes the Magic Hour so special—it lasts only briefly, but it often stays in your memory for a long time.
