
Jun 20, 2025
Filming with an interchangeable lens camera – for beginners
Shooting Video with an Interchangeable Lens Camera – Everything You Need to Know
You’ve been filming with your smartphone, but now you want to take the next step? Maybe you already have an interchangeable lens camera—or you’re thinking about getting one—and you’re wondering how to shoot really great videos with it? Good news: you’re in the right place. This guide covers the basics and key tips for using your camera not just to record, but to create high-quality videos—with more control, more depth, and a lot more expression.
Why Shoot Video with an Interchangeable Lens Camera?
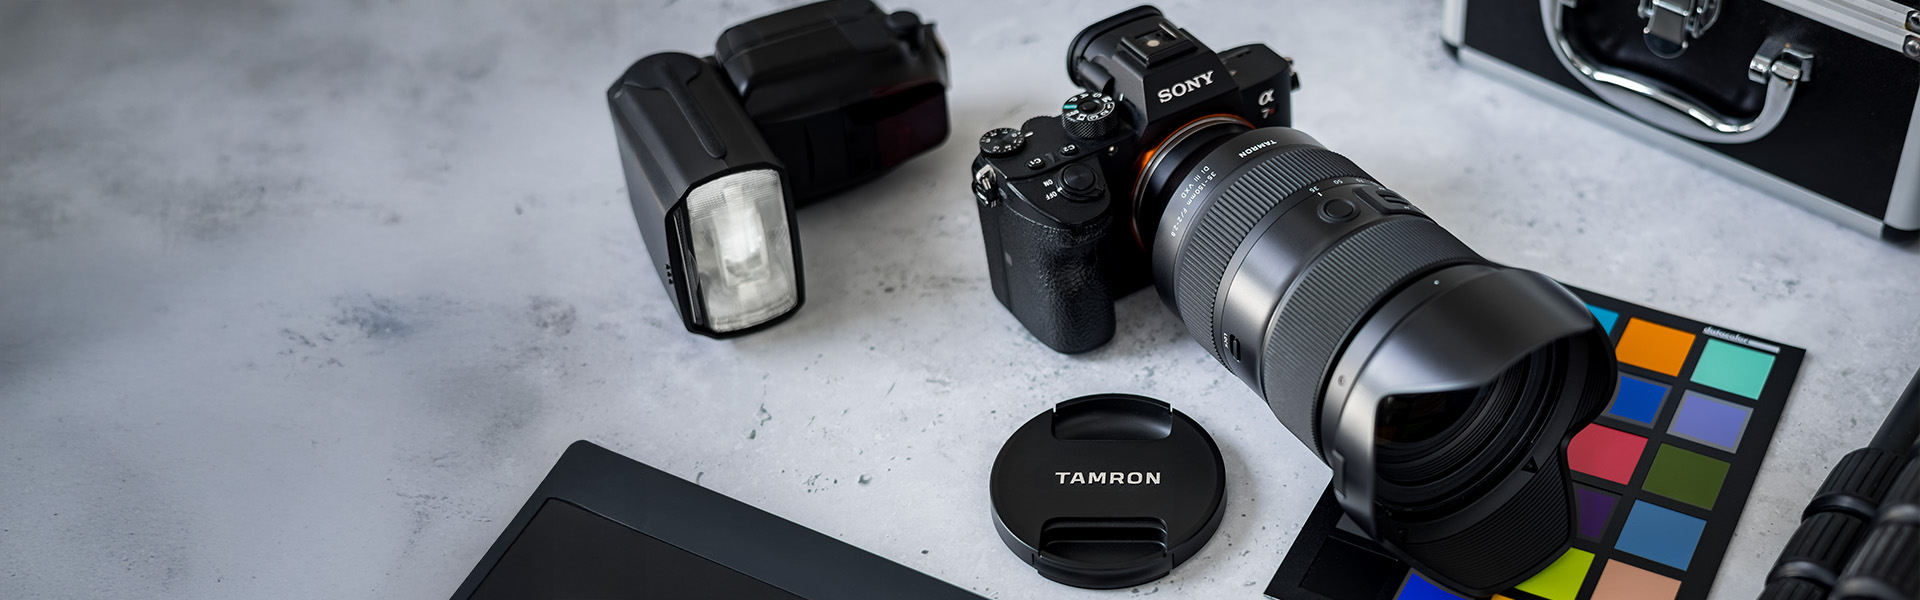
An interchangeable lens camera opens up tons of creative possibilities you don’t get with a smartphone—and it starts with image quality. The larger sensor captures more light. That means: less noise, more detail—even in low light. Plus, you can shoot in Full HD or even 4K, giving your videos a professional look right out of the gate.
And the heart of it all: the lenses. Depending on the mood or scene, you can choose different focal lengths: wide-angle for stunning landscapes, telephoto for beautiful bokeh and close-ups. You can also expand your setup with external microphones, tripods, or gimbals—getting closer step-by-step to professional filmmaking.
The Most Important Basics – To Make Your First Video Stand Out

Frame Rate (fps) – How Smooth Do You Want It?
Frame rate indicates how many frames per second are recorded—and how smooth the video looks. Some quick references:
24 fps: classic cinematic look
30 fps: standard for YouTube and TV
60 fps and above: perfect for sports, action, or slow motion
The higher the frame rate, the more light the camera needs—so in low light, open the aperture or increase ISO.
Pro tip: shoot at a high frame rate and play back slower = beautiful slow motion effects. It also helps hide small shakes when shooting handheld..
Shutter Speed – The Secret to Natural Movement
A simple rule: your shutter speed should be about double your frame rate.
Example:
30 fps → 1/60 second
60 fps → 1/120 second
If shutter speed is too fast, motion looks unnatural and choppy. A slightly longer shutter speed gives your video smoothness.
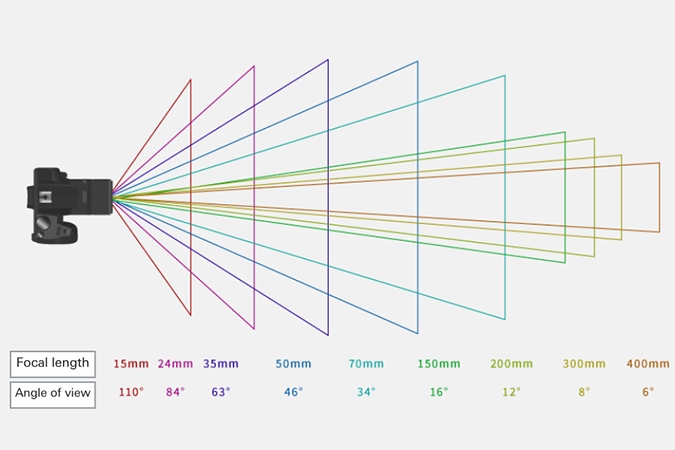
Focal Length & Field of View – How to Set the Mood
Wide angle: more environment, more depth, more dynamic
Telephoto: narrow view, lots of bokeh, strong subject focus
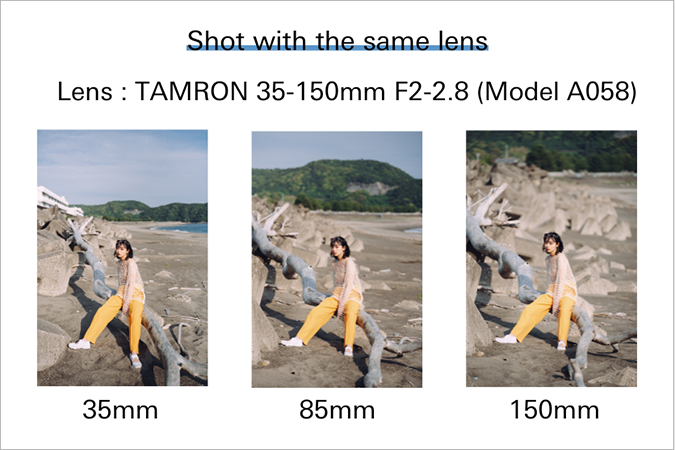
Playing with perspective is fun: wide angle makes close objects look bigger and backgrounds farther away. Telephoto compresses space—great to make the subject pop.

Depth of Field & Bokeh – Working with Blur
Depth of field depends directly on your aperture (f-number):
Wide aperture (e.g. f/1.8): shallow depth of field, lots of bokeh
Narrow aperture (e.g. f/8): more sharpness across the image
If you want to isolate your subject with a soft, dreamy background, go for a wide aperture.

ISO – Use Just Enough Light Sensitivity, Keep ISO Low
Higher ISO makes the sensor more sensitive—but also increases noise. So keep ISO as low as possible and adjust exposure with aperture or ND filters.
Correct Settings for Video – How to Nail It
Mode: manual (M)—for full control
Set your frame rate first → then adjust shutter speed
Choose aperture based on desired look and bokeh
Raise ISO only if necessary
Use ND filters if it’s too bright (e.g., shooting outdoors in sunlight)
White balance: better to set manually—so colors stay consistent even if lighting changes.
Three Things That Instantly Improve Your Videos
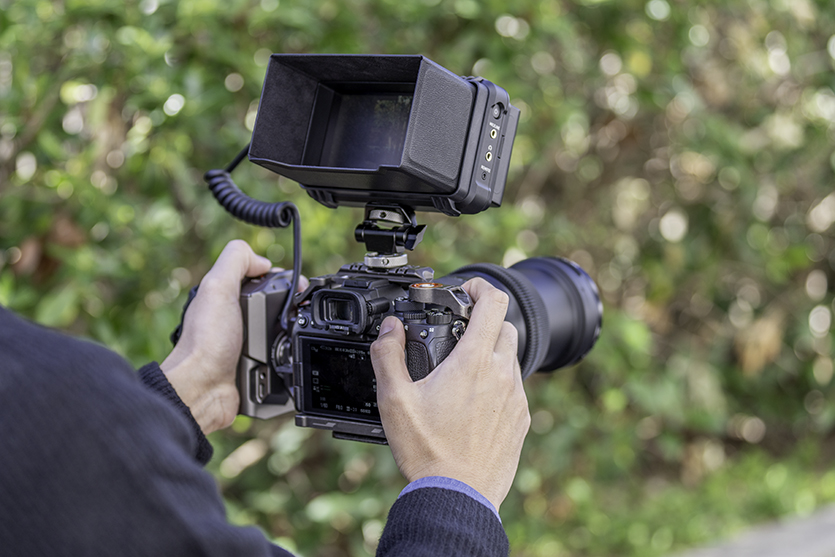
Stabilize the camera.
Handheld footage often shakes. Better to keep it steady—or use smooth moves with a gimbal or slider.Use zoom wisely.
Too much zooming looks unprofessional. If you want different angles, shoot multiple takes and edit later.ND filter = your best friend in daylight.
If you want wide aperture but don’t want overexposure, ND filters help get the right exposure.
Scene Tips – How to Make the Most of Your Gear
People, Portraits & Vlogs
A 35–50mm lens is perfect: it shows your subject naturally and wide aperture creates nice bokeh. Ideal for vlogs, interviews, or portraits. Outdoors with bright sun? Don’t forget your ND filter!
We need your consent to display this video
We use a third-party service to embed video content. This service may collect data about your activities. Please read the details and agree to the use of the service to watch this video.
Landscapes
Use wide angle, like 16–35mm—to capture a lot of space. Add variety with slow motion, time lapse, or slider moves. A tripod helps keep the shot stable.
Sports & Action
Timing and speed matter here:
High frame rate (at least 60 fps)
Telephoto for distant subjects
Tripod or gimbal to reduce shake
Choose your position well and check if tripods are allowed where you shoot!
Choosing the Right Lens – What to Look For
Brightness: the lower the f-number, the better for low light & nice bokeh
Look: every lens has its own colors and vibe
Focus breathing: less is better for video
Autofocus performance: important for moving subjects—fast and quiet is best
Image stabilization: very useful for handheld or telephoto shots
Durability and handling: key if shooting outdoors or often using manual focus
TAMRON Lens Utility™ – More Control Over Your Lens
If you shoot with TAMRON lenses, their TAMRON Lens Utility software lets you customize them: A-B Focus: precisely switch between two focus points, Focus Preset: set focus to a predefined distance—great for changing scenes, Focus Limiter: prevents focus from jumping to unwanted foreground objects, MF Method: choose how manual focus responds (linear or nonlinear), AF/MF Toggle: quickly switch autofocus/manual focus, even without a switch on the lens
Conclusion: Get the Most Out of Your Videos with the Right Knowledge
Shooting video with an interchangeable lens camera is a total game-changer—if you know how to set it up and use it well. Good preparation, the right lenses, and conscious technique make all the difference. Start now, experiment, and have fun finding your personal style.

TAMRON Lens Utility™
The TAMRON Lens Utility™ is software that lets you customize lens functions and update firmware for TAMRON lenses with a USB Type-C Connector Port – via computer or Android smartphone. By personalizing the settings to your shooting style, you can make photography even more enjoyable.
TAMRON products mentioned in this article
20-40mm F/2.8 Di III VXD
Model A062
17-50mm F/4 Di III VXD
Model A068
28-75mm F/2.8 Di III VXD G2
Model A063
35-150mm F/2-2.8 Di III VXD
Model A058
