

15.10.2025
Getting Exposure Right – How to Find the Perfect Brightness for Your Photos
Getting Exposure Right – How to Find the Perfect Brightness for Your Photos
Proper exposure is one of the key foundations of photography. It determines whether your image feels alive or whether important details get lost in the brightest or darkest areas. But what exactly does “getting the exposure right” mean, and what should you pay attention to in practice?
Correctly exposed – but not always ideal
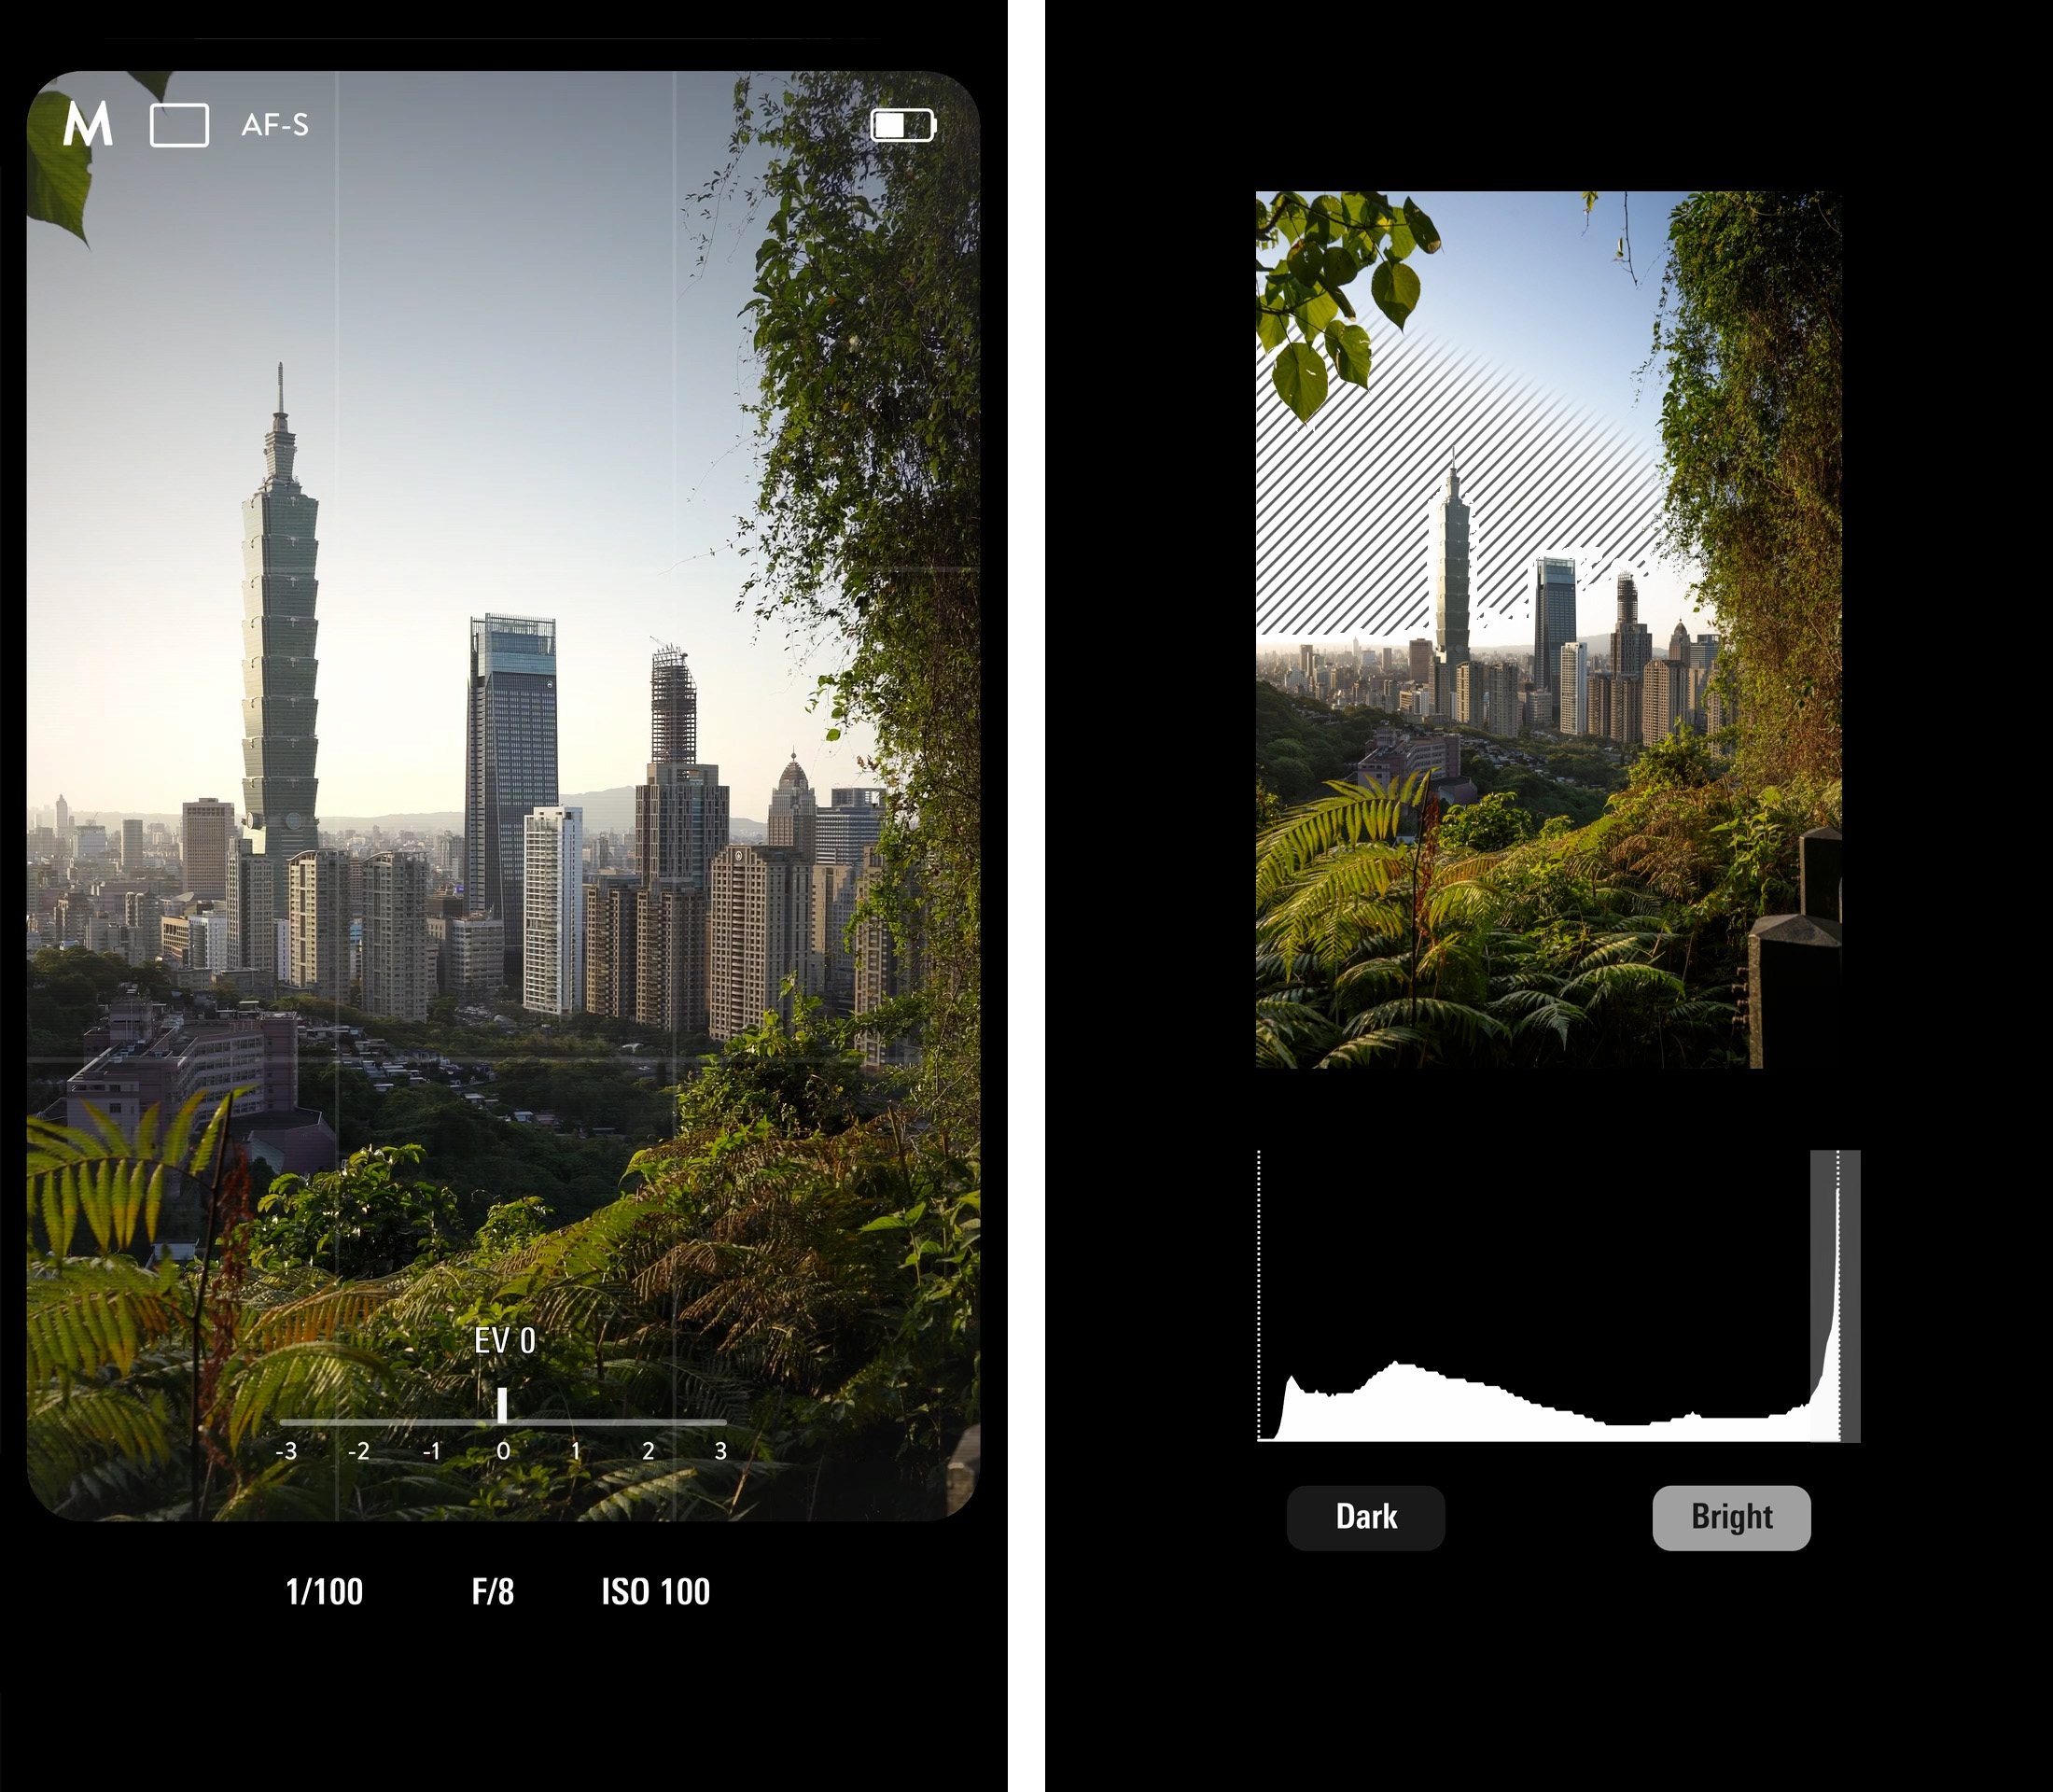
When you set your camera so that the exposure value (the EV) sits at zero, you’ll get a technically correct exposure. At first glance, the photo looks balanced – not too bright, not too dark. But once you start editing, you’ll quickly notice that a “perfect” exposure doesn’t always deliver the best results.
Learning to read the histogram
A quick look at the histogram explains why. This little graph shows the brightness distribution of your photo. On the left are the shadows, on the right the highlights. If the curve hits either edge, it means there are pure black or pure white areas with no detail left. Overexposure is especially tricky — once something turns completely white, there’s no bringing it back in post.
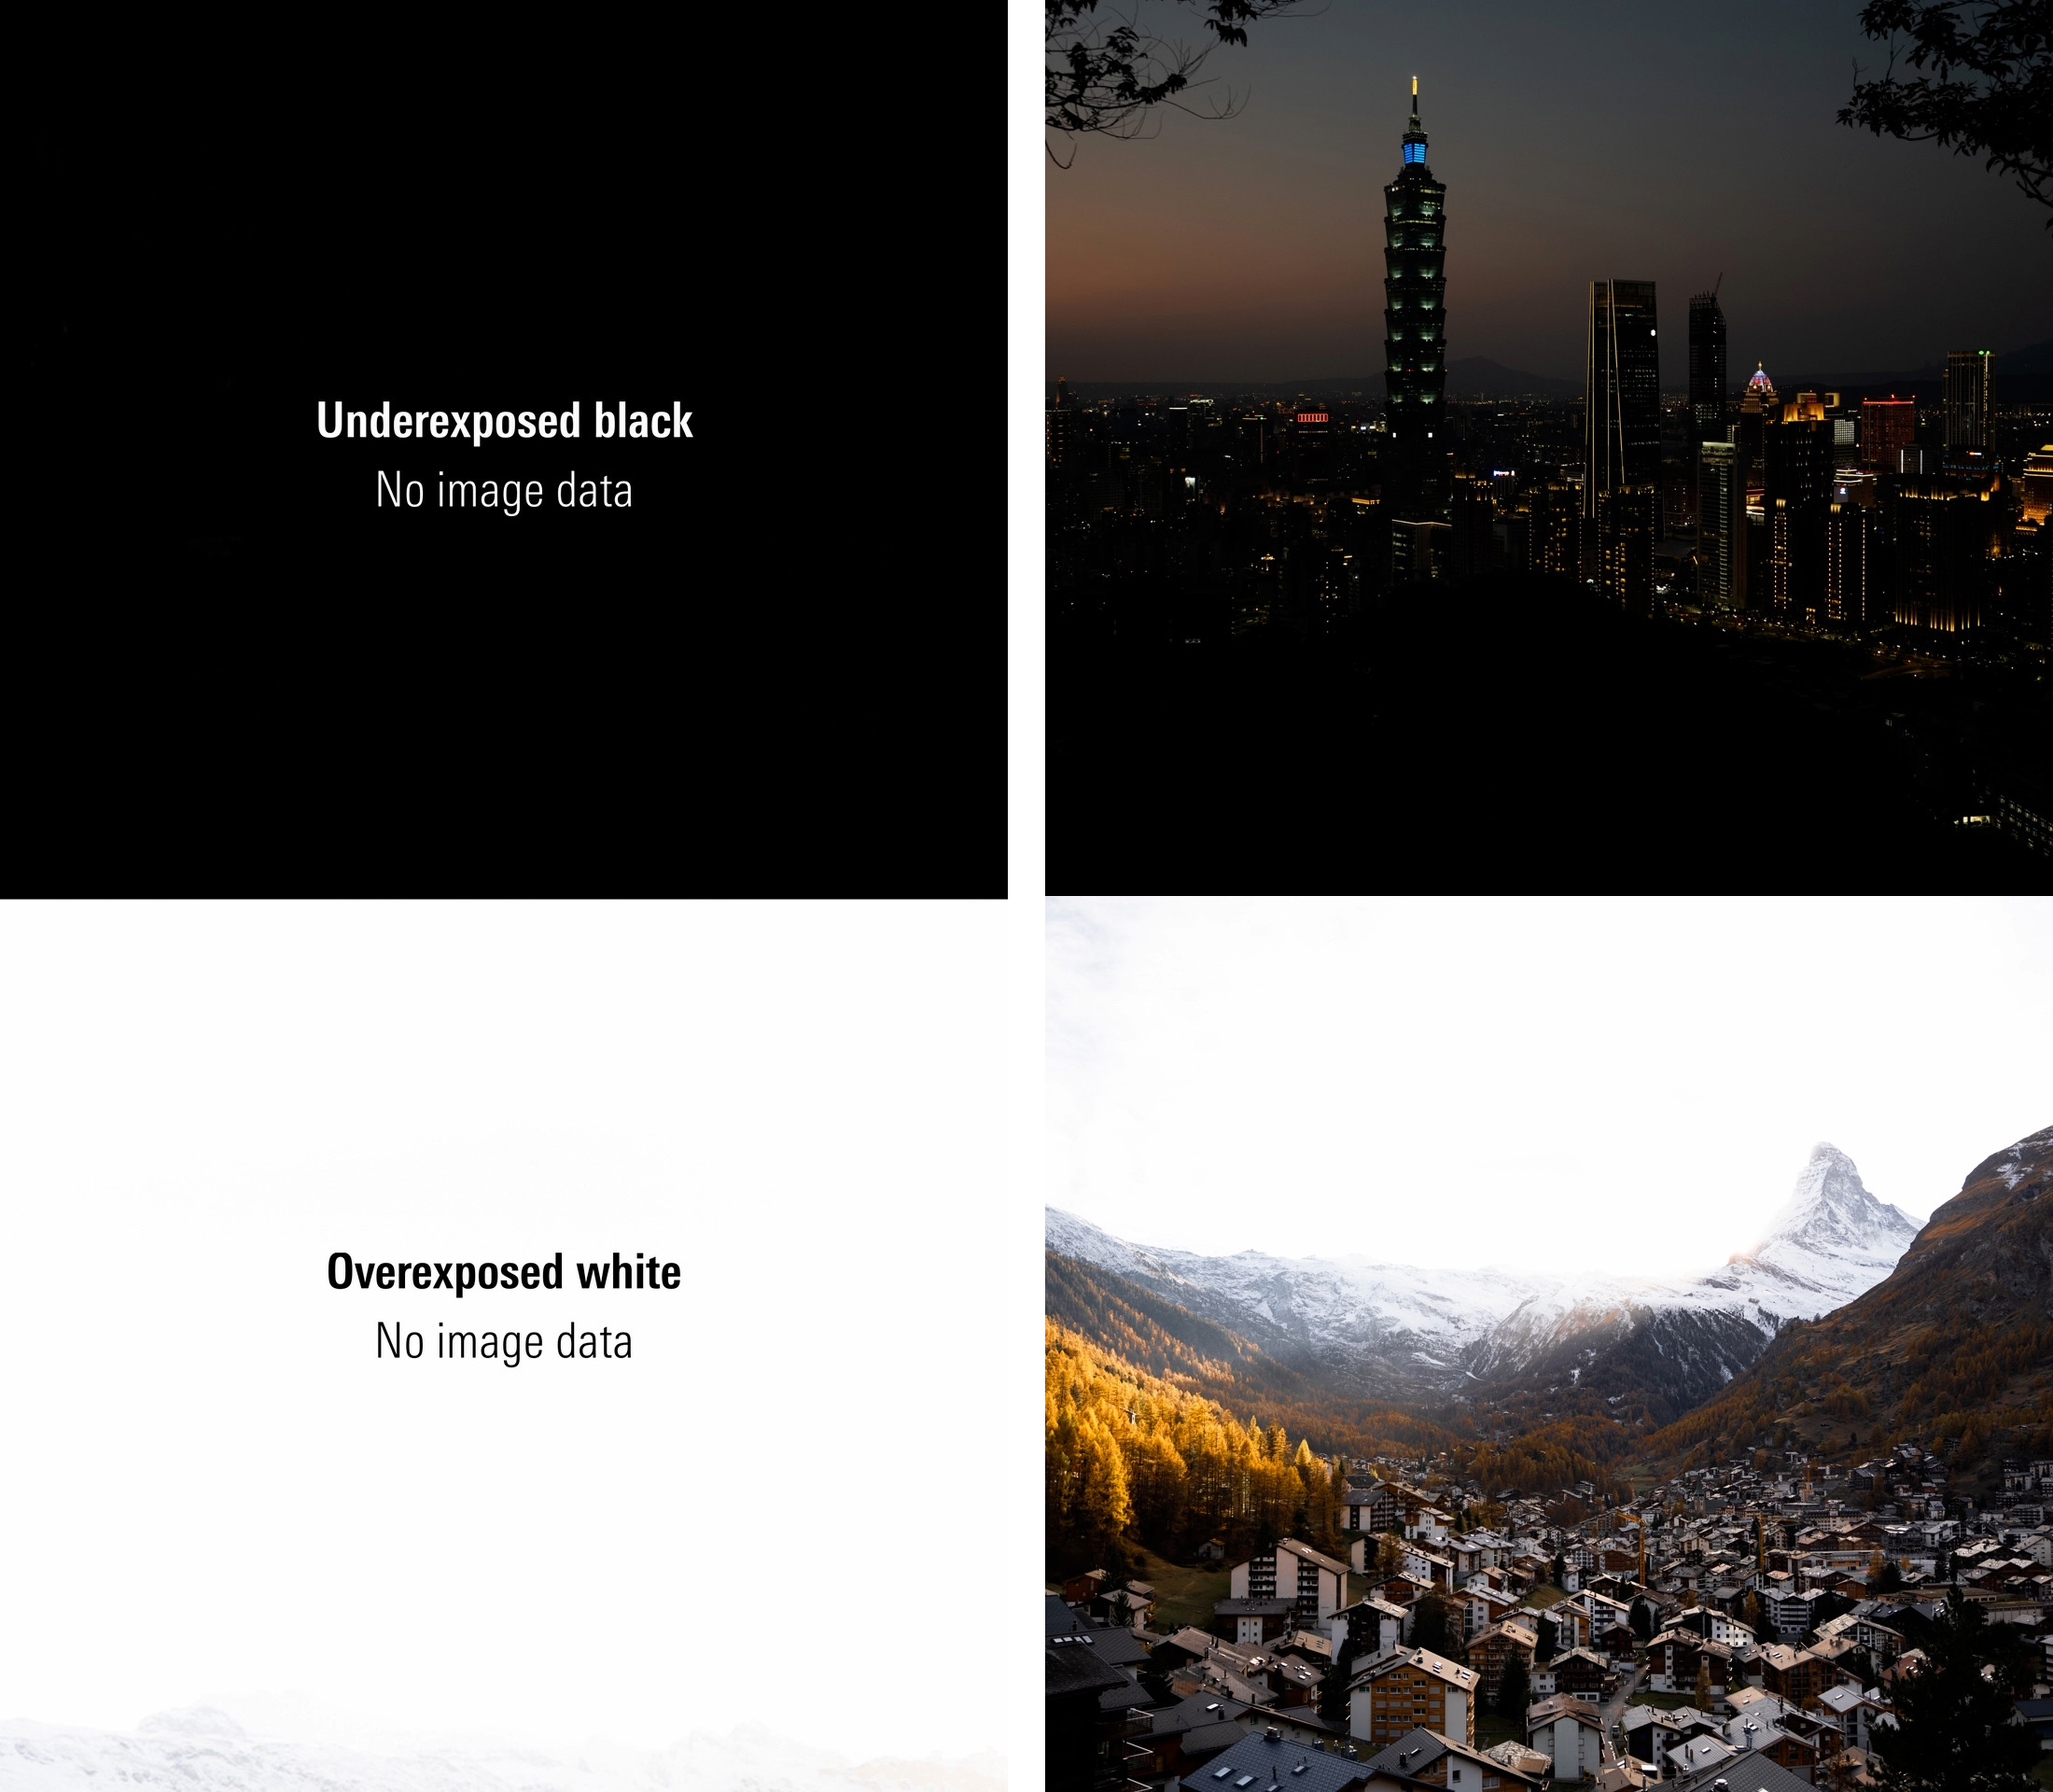
Underexposed or overexposed?
A simple test shows the difference: if you shoot an image a bit too dark and then brighten it later, you might lose a bit of quality, but most details remain intact. If you shoot too bright, though, those blown-out areas are gone for good.
The golden rule
That’s why there’s a simple but super useful rule: expose as bright as possible, but as dark as necessary. This helps you avoid blown highlights while keeping enough flexibility for editing later on.
Conclusion
Being intentional with exposure means not blindly trusting your camera’s meter, but actively shaping light and shadow. The histogram is your reliable guide — it shows at a glance whether you still have room in the highlights or shadows. Once you internalize these basics, your photos will look more balanced, richer in detail, and give you full creative freedom in post-processing.
In this video, we walk you through how to control exposure step by step and show the difference between under- and overexposed shots:
In diesem Beitrag erwähnte TAMRON-Produkte
20-40mm F/2.8 Di III VXD
Modell A062
